74 lines
2.1 KiB
Markdown
74 lines
2.1 KiB
Markdown
# QuickAuthLogin
|
||
|
||
基于[QuickAuth](https://qauth.cn)扫码登录平台开发的Typecho微信扫码登录插件
|
||
|
||
#### 更新记录
|
||
|
||
##### 2022/04/08 v0.9.3
|
||
|
||
1. 适配Typecho1.2版本
|
||
|
||
##### 2022/03/31 v0.9.2
|
||
|
||
1. 支持QuickAuth平台测试功能,可测试插件是否安装成功
|
||
2. 更新接入教程
|
||
|
||
##### 2022/03/07 v0.9.1
|
||
|
||
1. 取消替换登录界面功能,改为在源登录界面注入微信登录按钮
|
||
2. 删除多余配置功能,简化配置
|
||
|
||
## 起始
|
||
|
||
本插件是基于 QuickAuth 开发的 插件,使用前需要进入[QuickAuth平台](https://qauth.cn)注册配置自己的应用
|
||
|
||
如需修改插件或开发自己的接入项目,请参考 [QuickAuth接入文档](https://qauth.cn/doc/index.html)
|
||
|
||
插件地址:
|
||
|
||
Gitee: [https://gitee.com/wixy/QuickAuthLogin](https://gitee.com/wixy/QuickAuthLogin)
|
||
|
||
Github: [https://github.com/mr-wixy/QuickAuthLogin](https://github.com/mr-wixy/QuickAuthLogin)
|
||
|
||
(请勿与其它同类插件同时启用,以免互相影响)
|
||
|
||
## 使用方法
|
||
|
||
第 1 步:下载本插件,解压,放到 `usr/plugins/` 目录中;
|
||
|
||
第 2 步:文件夹名改为 `QuickAuthLogin`;
|
||
|
||
第 3 步:登录管理后台,激活插件;
|
||
|
||
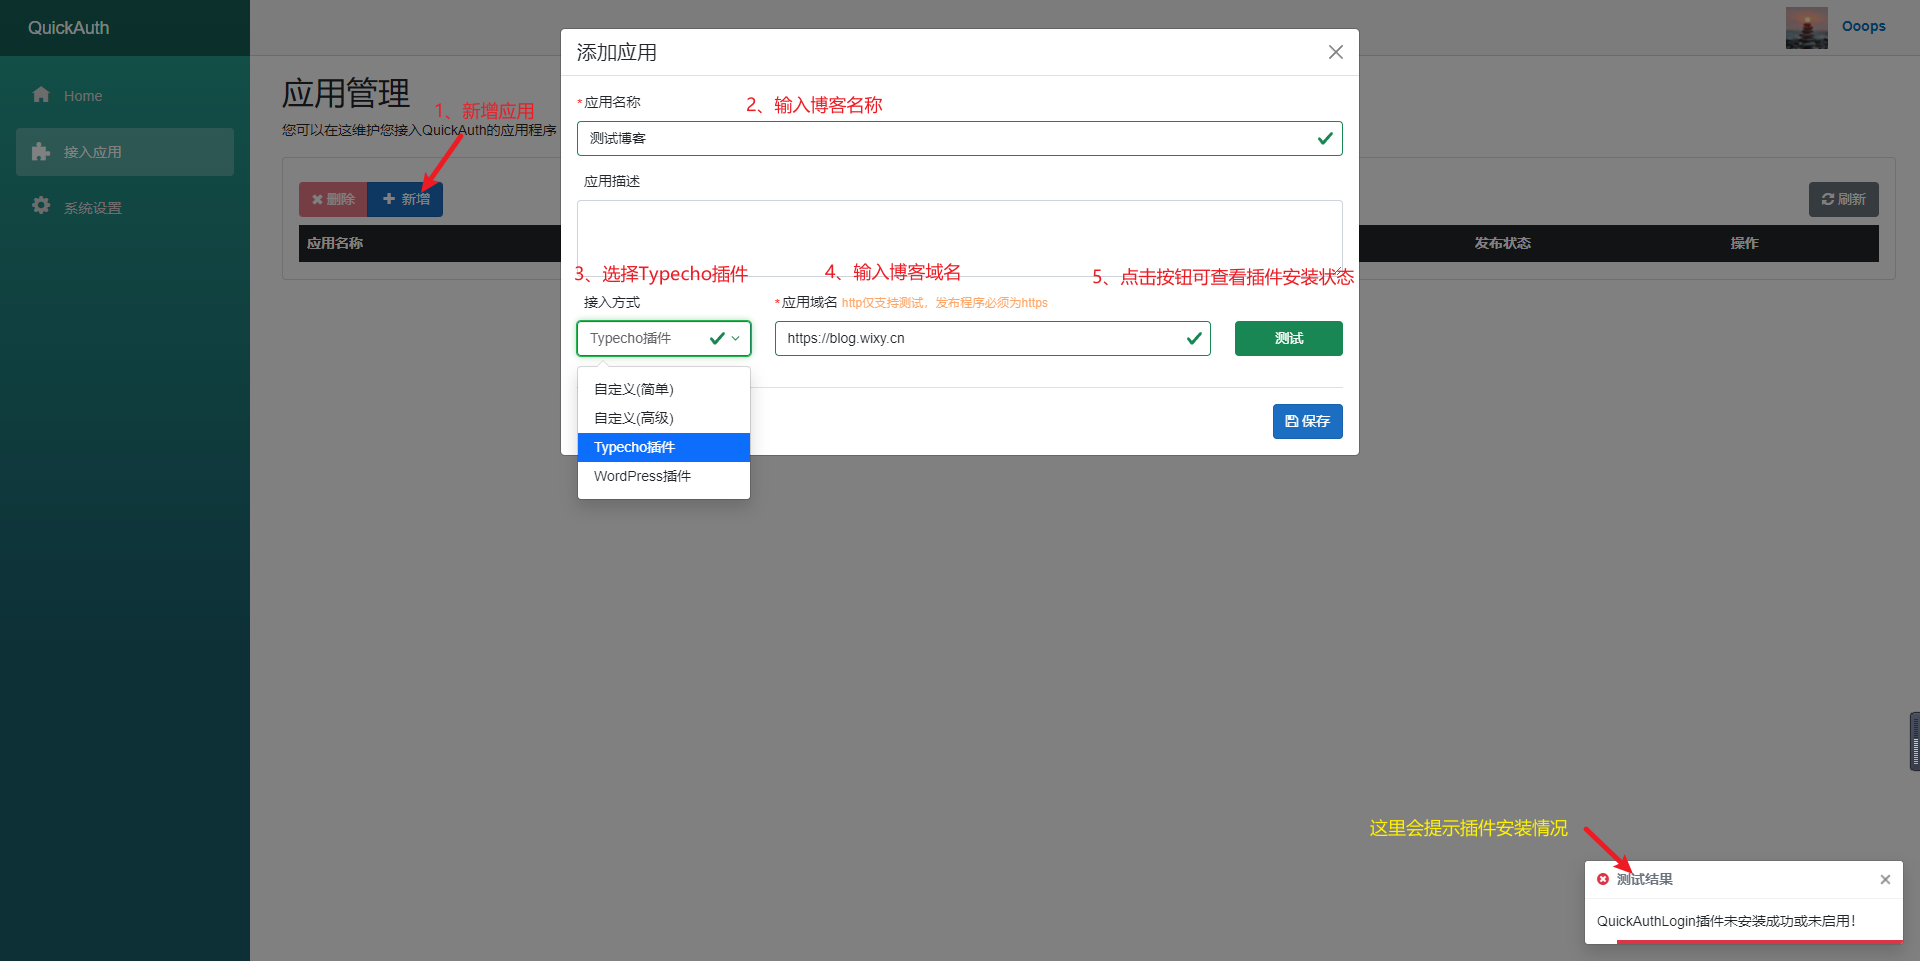
第 4 步:登录QuickAuth网站创建接入应用;
|
||
|
||
|
||
|
||
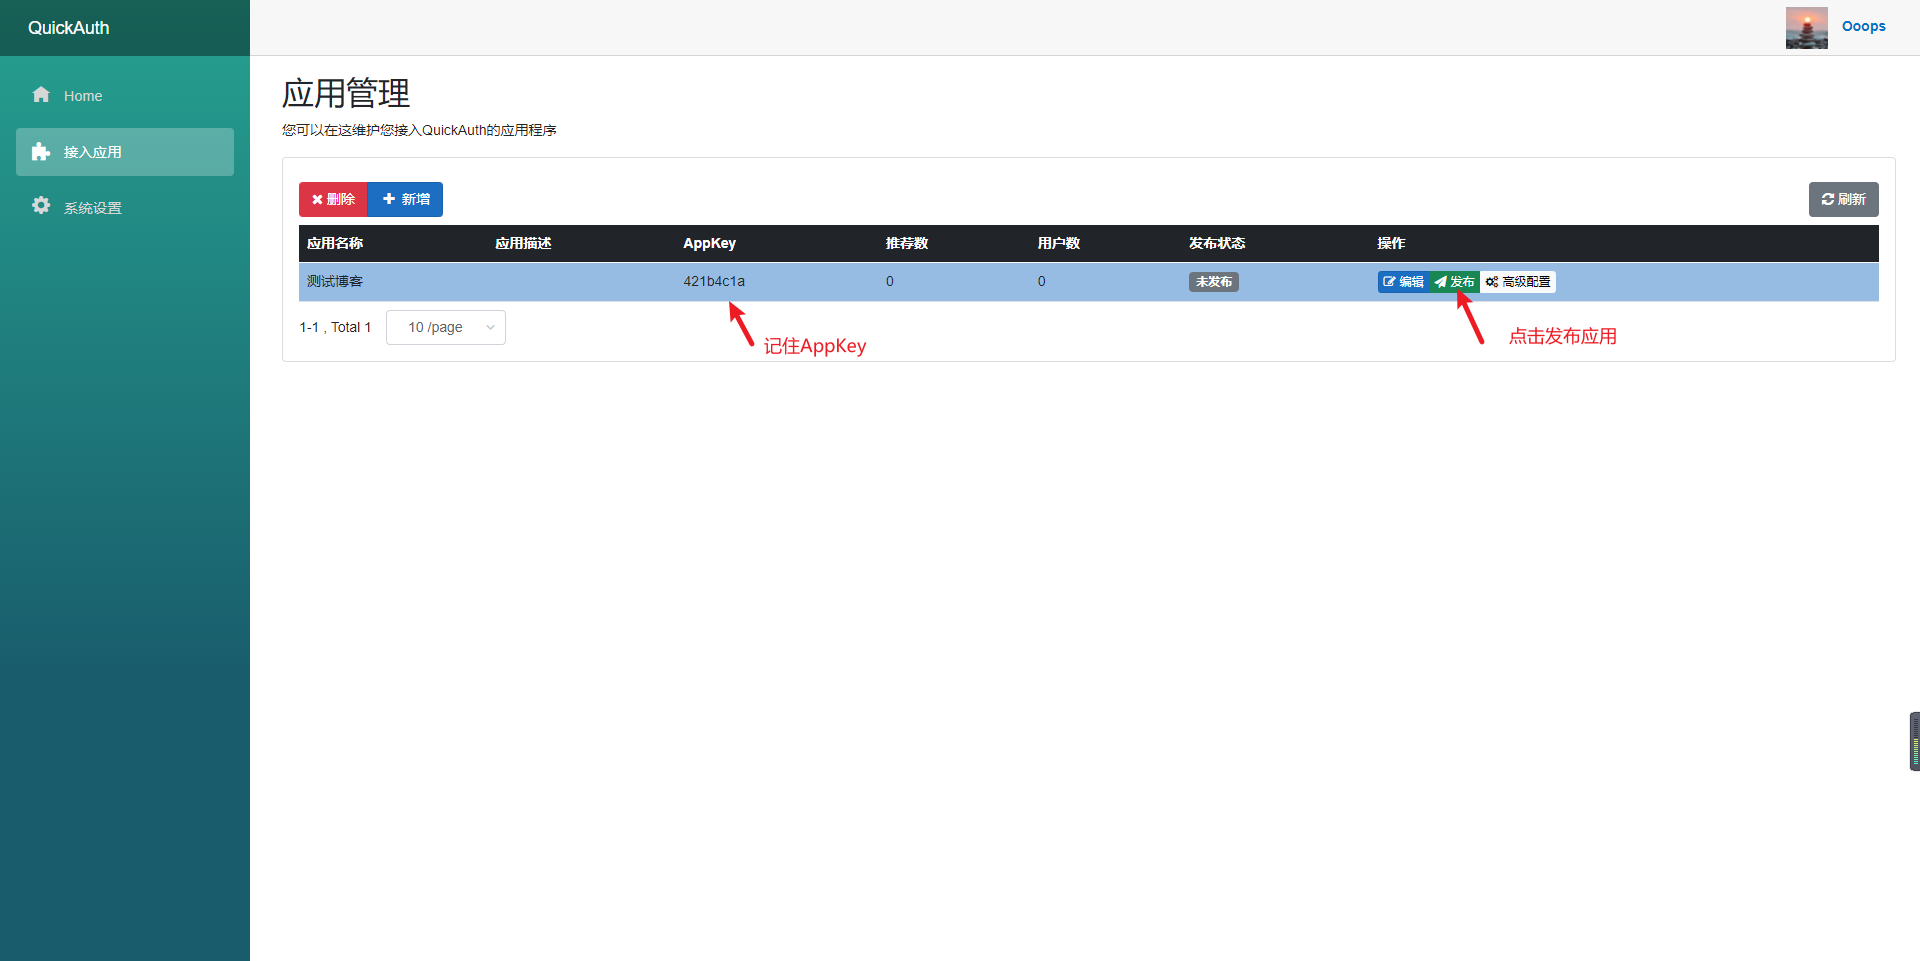
第 5 步:发布应用;
|
||
|
||
|
||
|
||
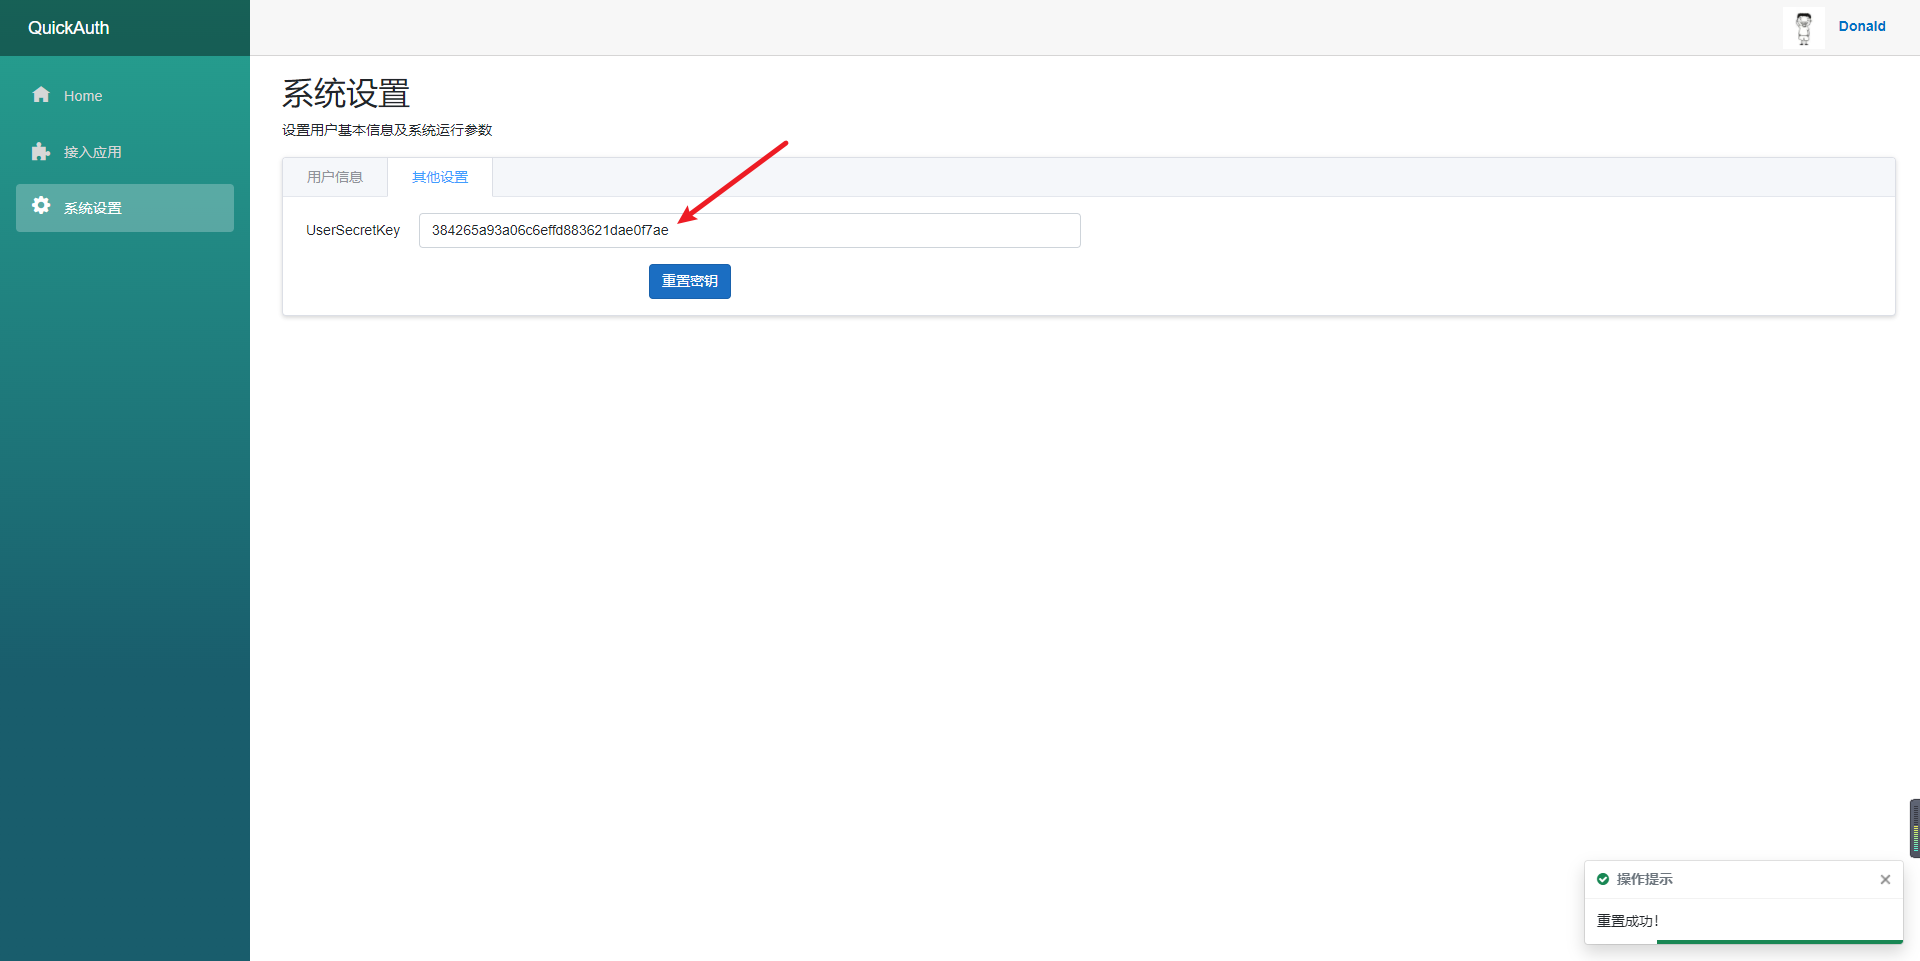
第 6 步:[获取](https://qauth.cn/config/secret)UserSecretKey;
|
||
|
||
|
||
|
||
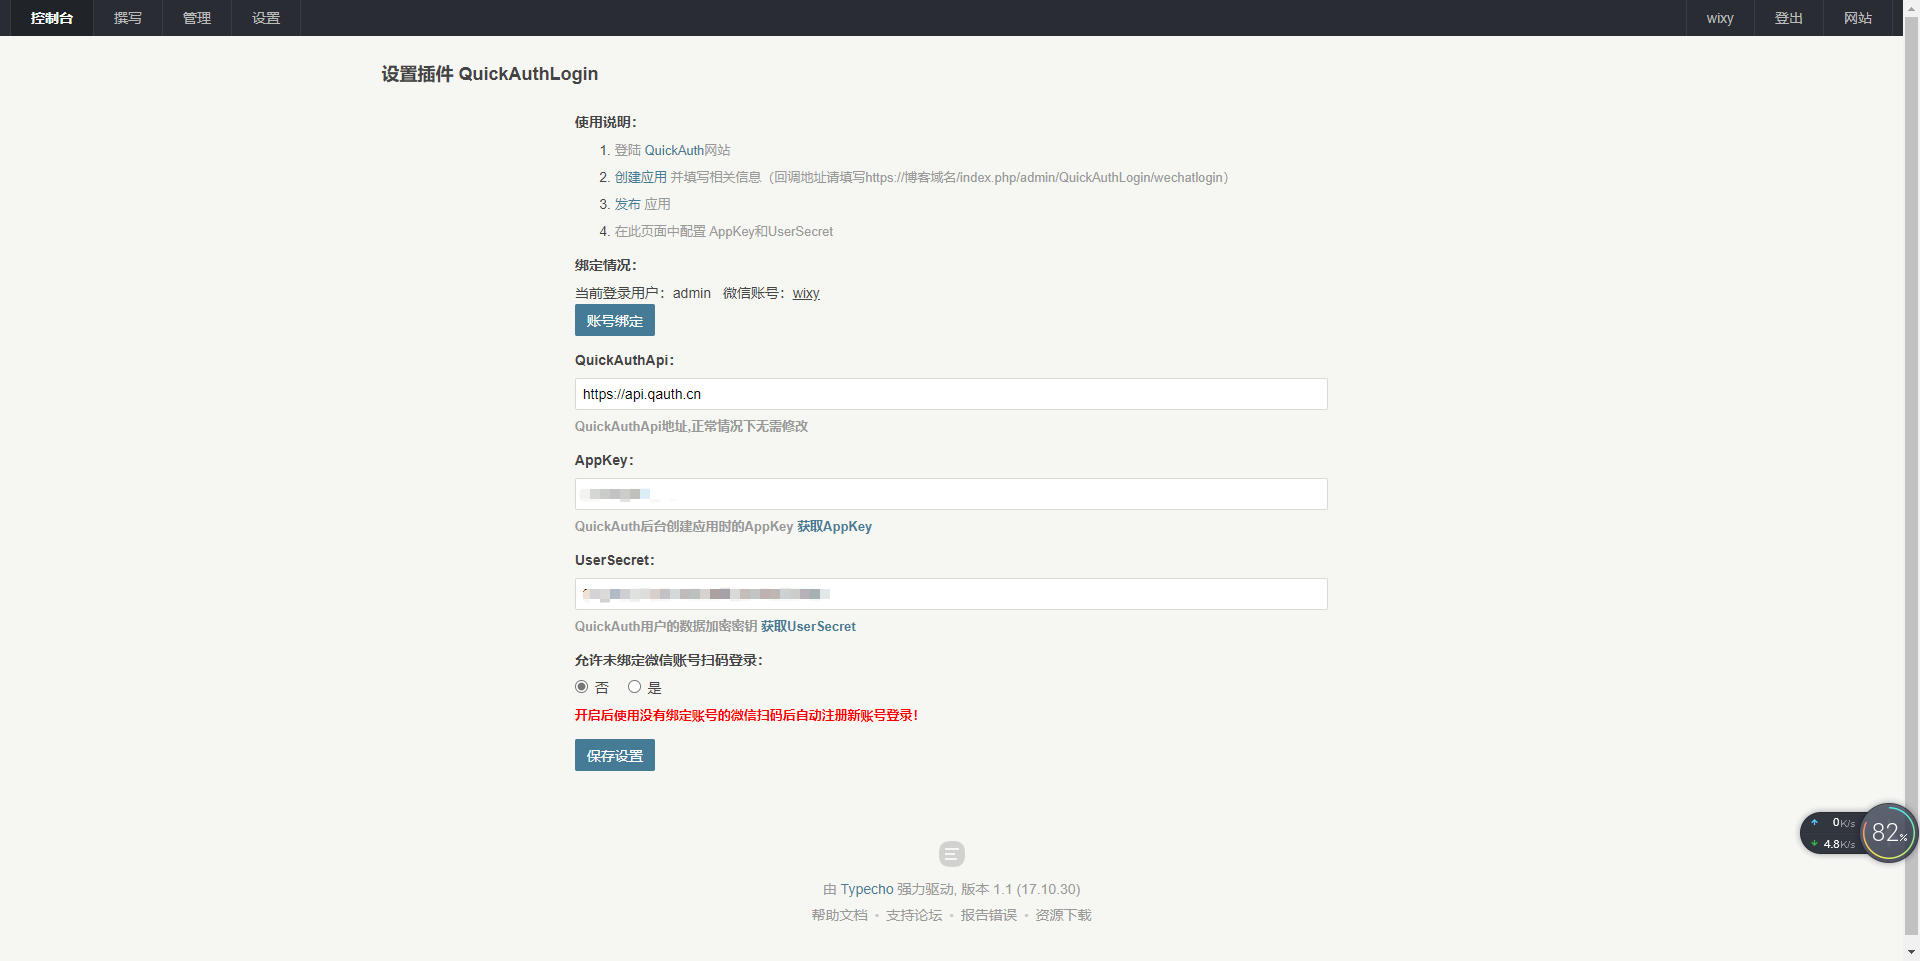
第 7 步:进入博客插件后台配置AppKey和UserSecret;
|
||
|
||
|
||
|
||
<br/>
|
||
|
||
## 重要说明
|
||
|
||
1. QuickAuthApi 默认配置,正常情况下无需修改(除非QuickAuth网站接口地址改了)
|
||
2. 允许未绑定微信账号扫码登录开启后,未绑定的微信扫码则会自动注册账号
|
||
|
||
## 与我联系
|
||
|
||
作者:wixy
|
||
|
||
如果有任何意见或发现任何BUG请提issue或直接联系我
|
||
|
||
邮箱:[wixy@qq.com](mailto:wixy@qq.com)
|
||
|
||
博客:[https://blog.wixy.cn/](https://blog.wixy.cn/) |